Tree Felling: How To Safely Remove a Tree Yourself

Tree felling is a process of removing trees from a property. While it may seem easy, it’s important to understand the potential dangers and safety considerations associated with it. If done correctly and safely, you can save time and money by successfully removing trees from your property. This guide will provide an overview of tree felling and step-by-step guidance on properly removing a tree.
Tree felling is an intimidating task, but in reality, it is something that anyone with basic knowledge of tree care can do safely. While the task can be dangerous, it doesn’t have to be if you approach it with due consideration for necessary precautions. This post will reveal the best techniques and tools used by professional arborists and tree care specialists to help you safely remove a tree. We’ll also provide tips to help you recognize the signs you need to remove a tree and plan a tree-felling job.
So, if you’re looking to remove a tree safely, this is the place to start. With a few basic tools and techniques, you can get the job done safely, quickly, and with minimal risk to yourself and your property.
Safety Considerations
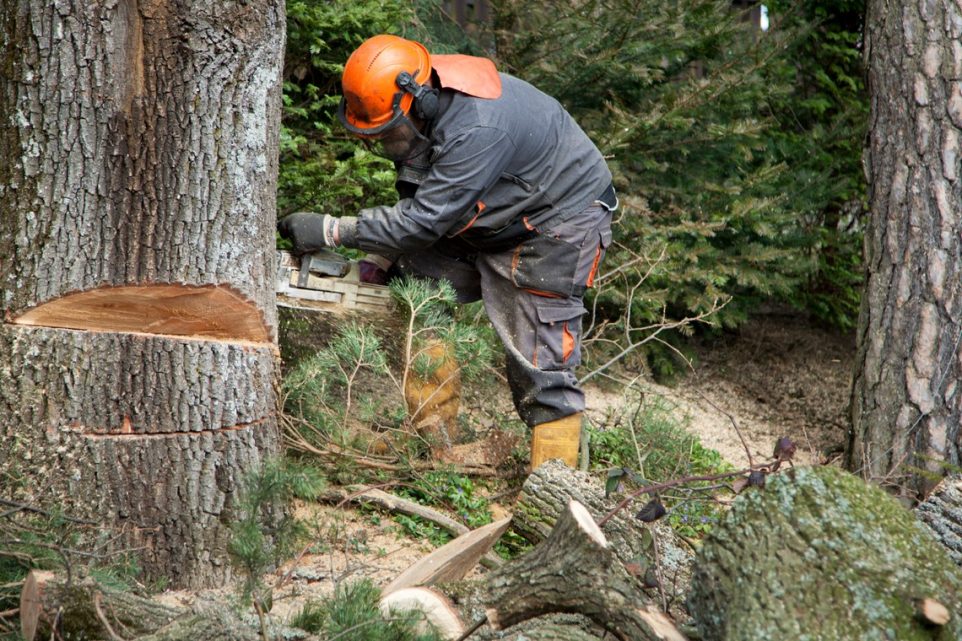
Remember several essential safety considerations before attempting to remove any trees from your property. First, only fell a tree if the area around it is clear of people and obstacles. Second, wear protective equipment such as goggles, gloves, and hearing protection. Third, ensure you have the appropriate tools, such as a chainsaw, chisel, wedge, and axe, ready for use before starting the process.
Step-by-Step Guide
Felling a tree is a serious task that requires careful planning and execution to ensure safety and prevent property damage. Here’s a more detailed look at each step involved in safely removing a tree yourself.
Determining the Tree’s Fall Direction
The first step in the process of felling a tree is to determine its natural fall direction. This involves assessing its lean, the distribution and weight of its branches, and the surrounding area for any structures or other obstacles. Once you have a clear understanding of the safest direction for the tree to fall, you can begin the cutting process.
Start by creating a notch on the side of the trunk, facing the direction you want the tree to fall. This notch, known as the directional notch, acts as a guide for the tree’s fall and should be made at a 45-degree angle, penetrating about one-third into the diameter of the trunk. This cut not only helps direct the tree’s fall but also helps to control its falling speed and direction.
Creating the Hinge
The hinge is crucial for controlling the tree’s fall and ensuring it goes in your intended direction. To create a hinge, make a horizontal cut on the opposite side of the trunk from your directional notch. This cut should be about two-thirds of the way through the trunk. The hinge should be left intact as it guides the tree during its fall, ensuring it doesn’t kick back or split unpredictably.
Cutting Additional Wedges
For larger trees, or those with thick trunks, additional cuts or wedges may be necessary to reduce the physical strain and enhance control over the fall. Cut these notches into both sides of the trunk around the hinge area. These cuts help to weaken the trunk but still allow it to hold its shape long enough to control the direction as it begins to fall.
Start Sawing
With your notches and hinge in place, begin sawing into the hinge with a chainsaw. Continue cutting carefully until you feel or hear the tree begin to move. It’s important to be vigilant and ready to retreat to a safe distance immediately. As the tree starts to fall, cease cutting and quickly move along your planned escape route, ideally at a 45-degree angle from the back of the fall direction.
Securing Loose Branches
After the tree has fallen, it’s possible that some branches will remain loosely attached to the trunk. Carefully approach the fallen tree and remove these branches to prevent them from causing injury or obstruction. You can use an axe or continue with the chainsaw, but proceed with caution, as the branches may shift as you work.
Aftercare
Once the tree is down and the area is deemed safe, the next step is to manage the aftermath. Inspect the area for any large stumps or remaining debris. If you’re in an urban setting, consider hiring professional services such as wood chippers or stump grinders to help clear the area efficiently. Proper disposal of the tree material is crucial to avoid environmental fines or damage. Check with local environmental services for guidelines on how to properly dispose of tree remnants, as many areas have specific regulations regarding organic waste.